You've got a track. You want the vocals without the drums, or the drums without the bass, or the bass without everything else. That's stem separation, and GreenGo does it with one click using Meta's Demucs AI model.
This guide walks through the Stem Separation tab in GreenGo 2.0.4, from opening the tab to working with your separated stems. No theory, no AI math, just the buttons and what they do.
What Is Stem Separation?
Stem separation takes a finished, mixed audio file and splits it into individual components. A mixed track is like a baked cake: flour, eggs, sugar, and butter all blended together. Stem separation is the AI trying to un-bake the cake and give you back the ingredients.
It's not perfect (some information is permanently lost during mixing), but modern AI gets remarkably close. GreenGo uses Demucs HTDemucs, a hybrid waveform-plus-spectrogram model from Meta's FAIR research lab. It's the same model family used by professional audio tools, and it runs locally on your machine, no cloud, no upload, no subscription per song.
For a deeper explanation of how the AI works, see our technical guide to stem separation. This post is about using it.
Getting Started: Opening the Tab
Open GreenGo and look at the bottom toolbar. Click the button labeled Stem Sep. (it has a waveform icon). The main area switches to the Stem Separation panel.
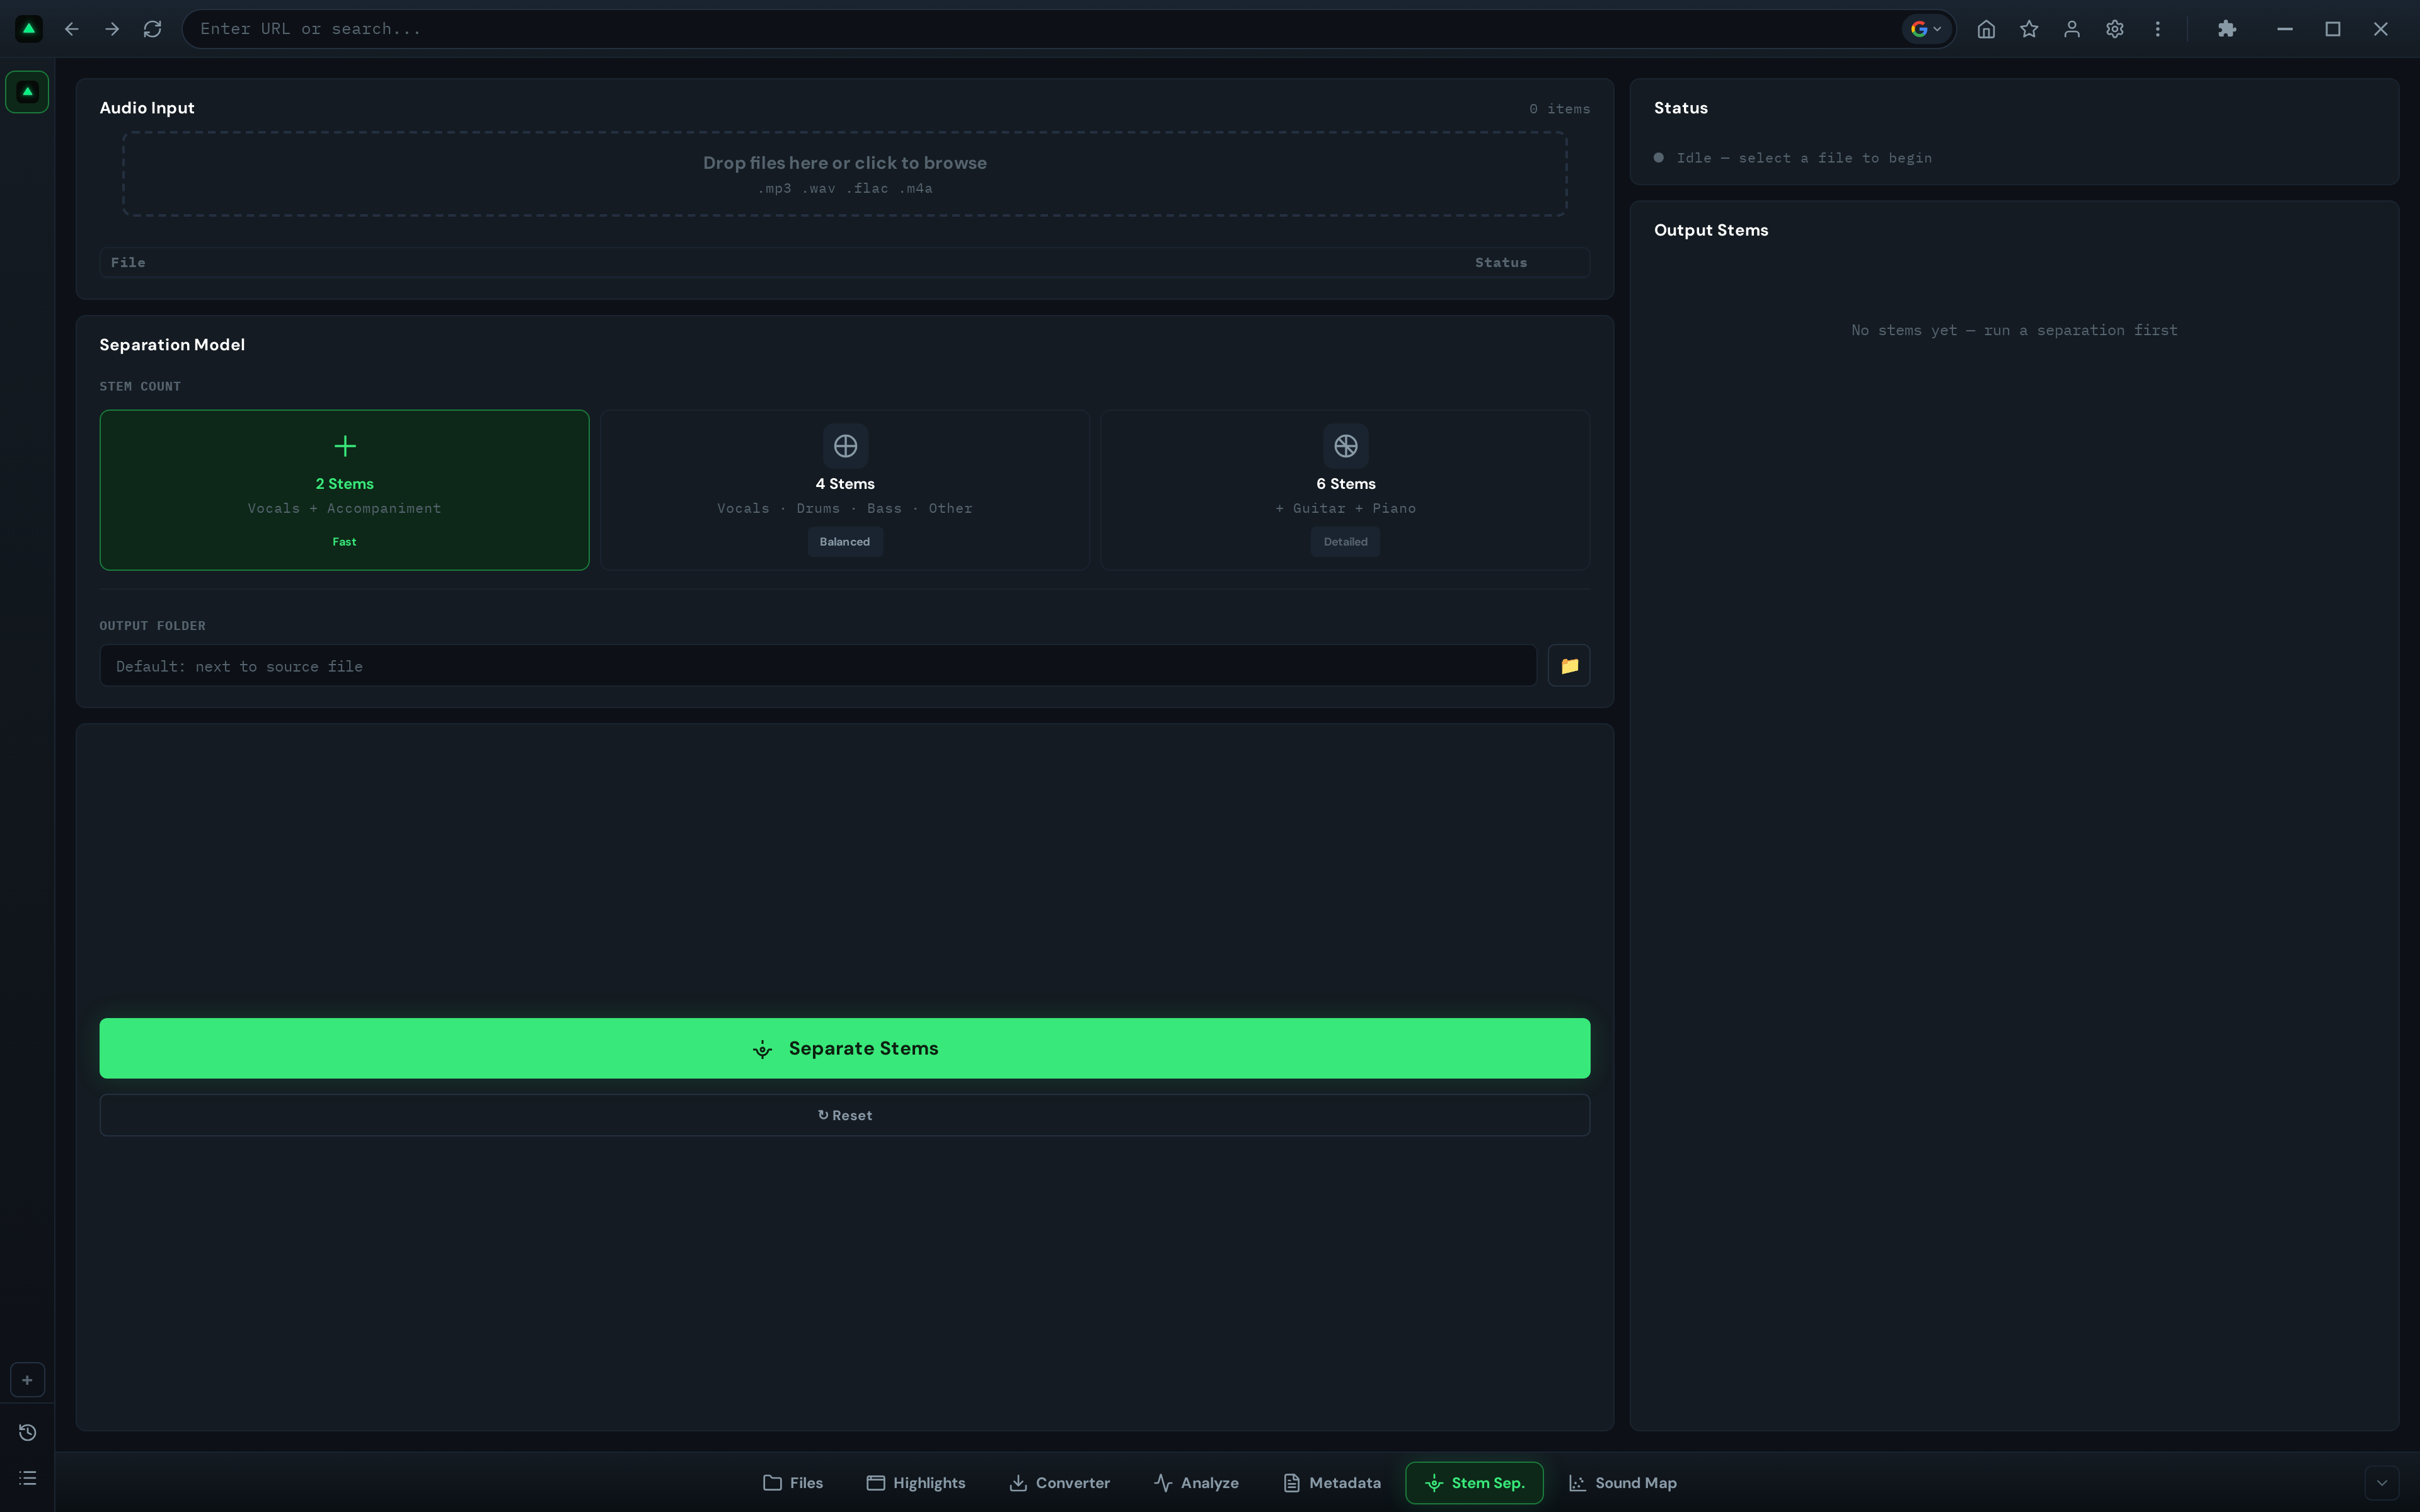
The layout is two columns:
- Left column: Input and settings (file selection, model choice, output folder)
- Right column: Status and results (progress, errors, separated stem list)
When you first open the tab, the status panel shows 'Idle — select a file to begin.' That's your starting point.
Choosing a Model: 2, 4, or 6 Stems?
Before you load a file, pick your separation model. GreenGo offers three options, displayed as clickable cards:
| Mode | Label | Stems | Best For | Speed |
|---|---|---|---|---|
| 2 Stems | Fast | Vocals + Accompaniment | Quick vocal isolation, acapellas, instrumentals | Fastest |
| 4 Stems | Balanced | Vocals, Drums, Bass, Other | Remixes, DJ edits, mashups | Medium |
| 6 Stems | Detailed | Vocals, Drums, Bass, Other, Guitar, Piano | Production, sampling, detailed isolation | Slowest |

Which should you pick?
- Just need an acapella or instrumental? 2 Stems. It's the fastest and the vocal isolation quality is the same as the higher modes.
- Making a remix or DJ edit and need drums separate from bass? 4 Stems. This is the sweet spot for most use cases.
- Need to isolate the piano or guitar specifically? 6 Stems. The only mode that separates guitar and piano as individual stems.
Click a card to select it. The active card gets a highlighted border and the radio button checks automatically.
Step-by-Step: Separating a Track
Here's the full process from file selection to finished stems:
Step 1: Select an Audio File
Click the browse button (folder icon) next to the file input field. A system file picker opens, filtered to audio formats: MP3, WAV, FLAC, M4A, OGG, AAC, WMA. Select your file. The file path appears in the input field, and the filename and format show below it (e.g., 'my_track.mp3 — MP3').
Step 2: Choose an Output Folder (Optional)
By default, stems are saved to a folder next to your source file: source_folder/stems/htdemucs/track_name/. If you want them somewhere else, click the browse button next to the Output Folder field and pick a destination. Leave it blank to use the default.
Step 3: Click 'Separate Stems'
Hit the big green button. The status panel switches from idle to running, showing a spinner and progress messages. You'll see messages like:
- 'Submitting job...'
- 'Loading Demucs model...' (first run only, the model loads into memory)
- 'Processing audio...' (this is the longest phase)
- 'Writing stems...'
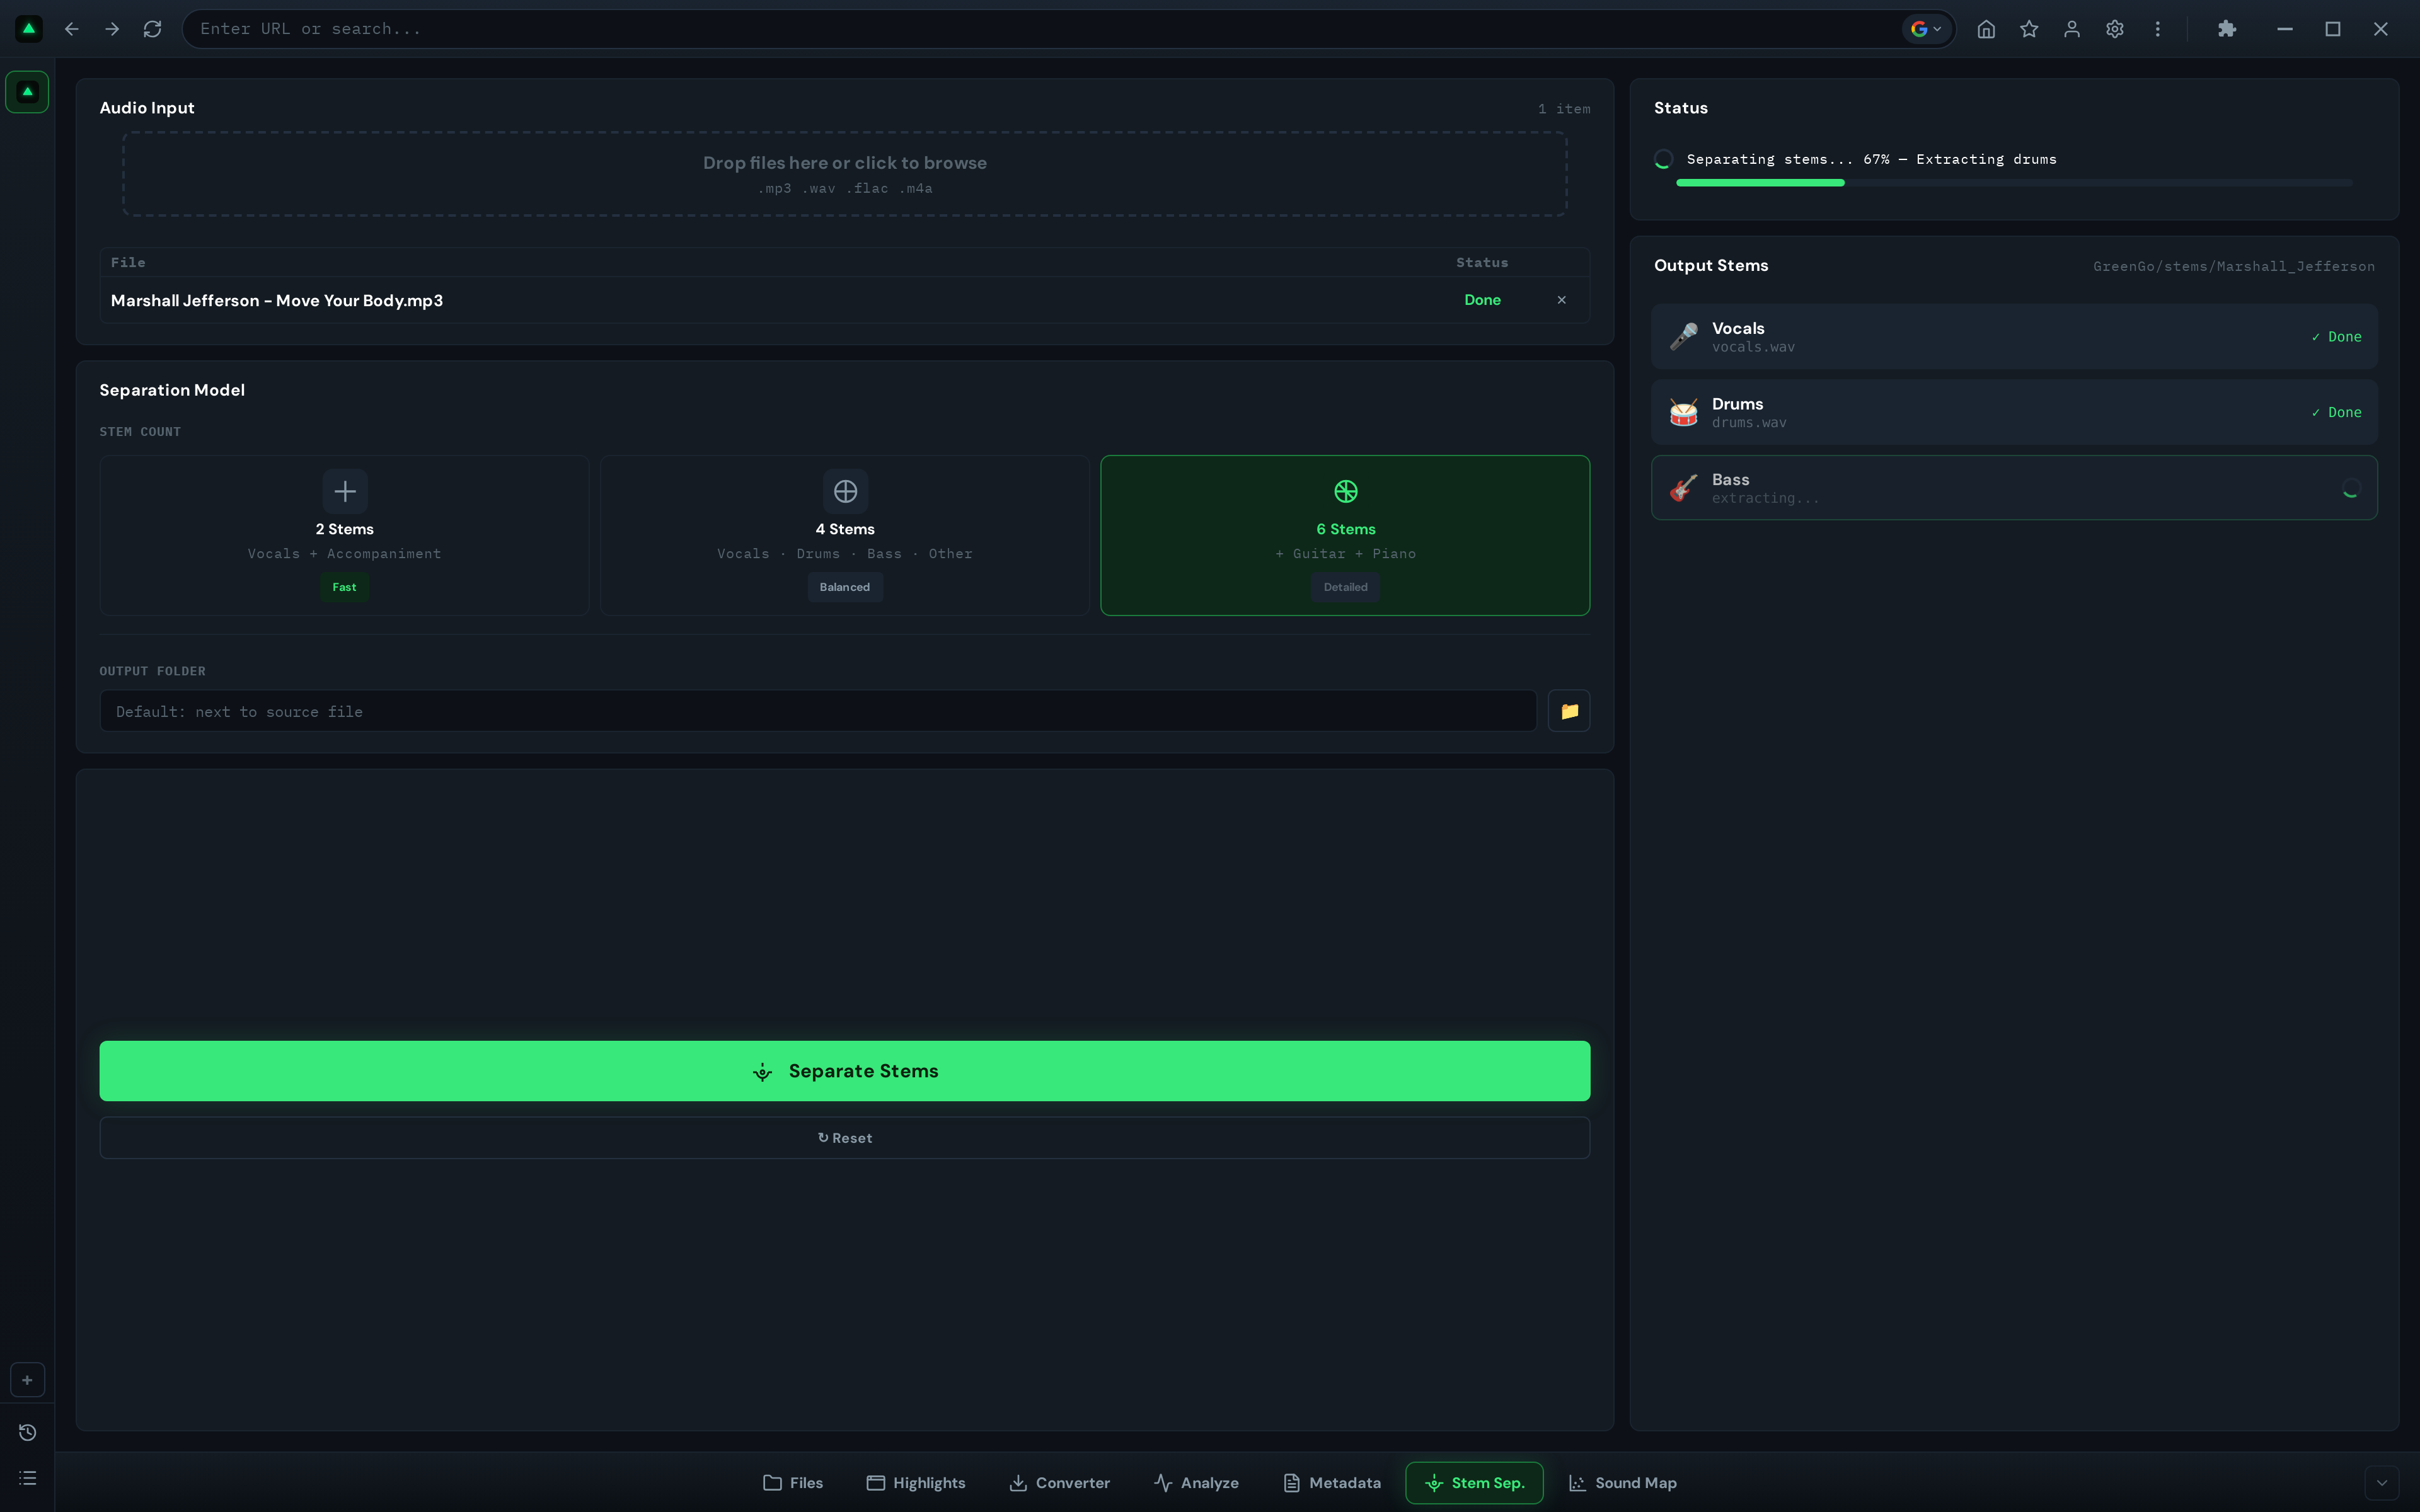
The button disables and shows 'Separating...' during processing. Depending on your hardware and the track length, this takes anywhere from 30 seconds to a few minutes. GPU acceleration is used automatically if you have an NVIDIA GPU.
Step 4: View Results
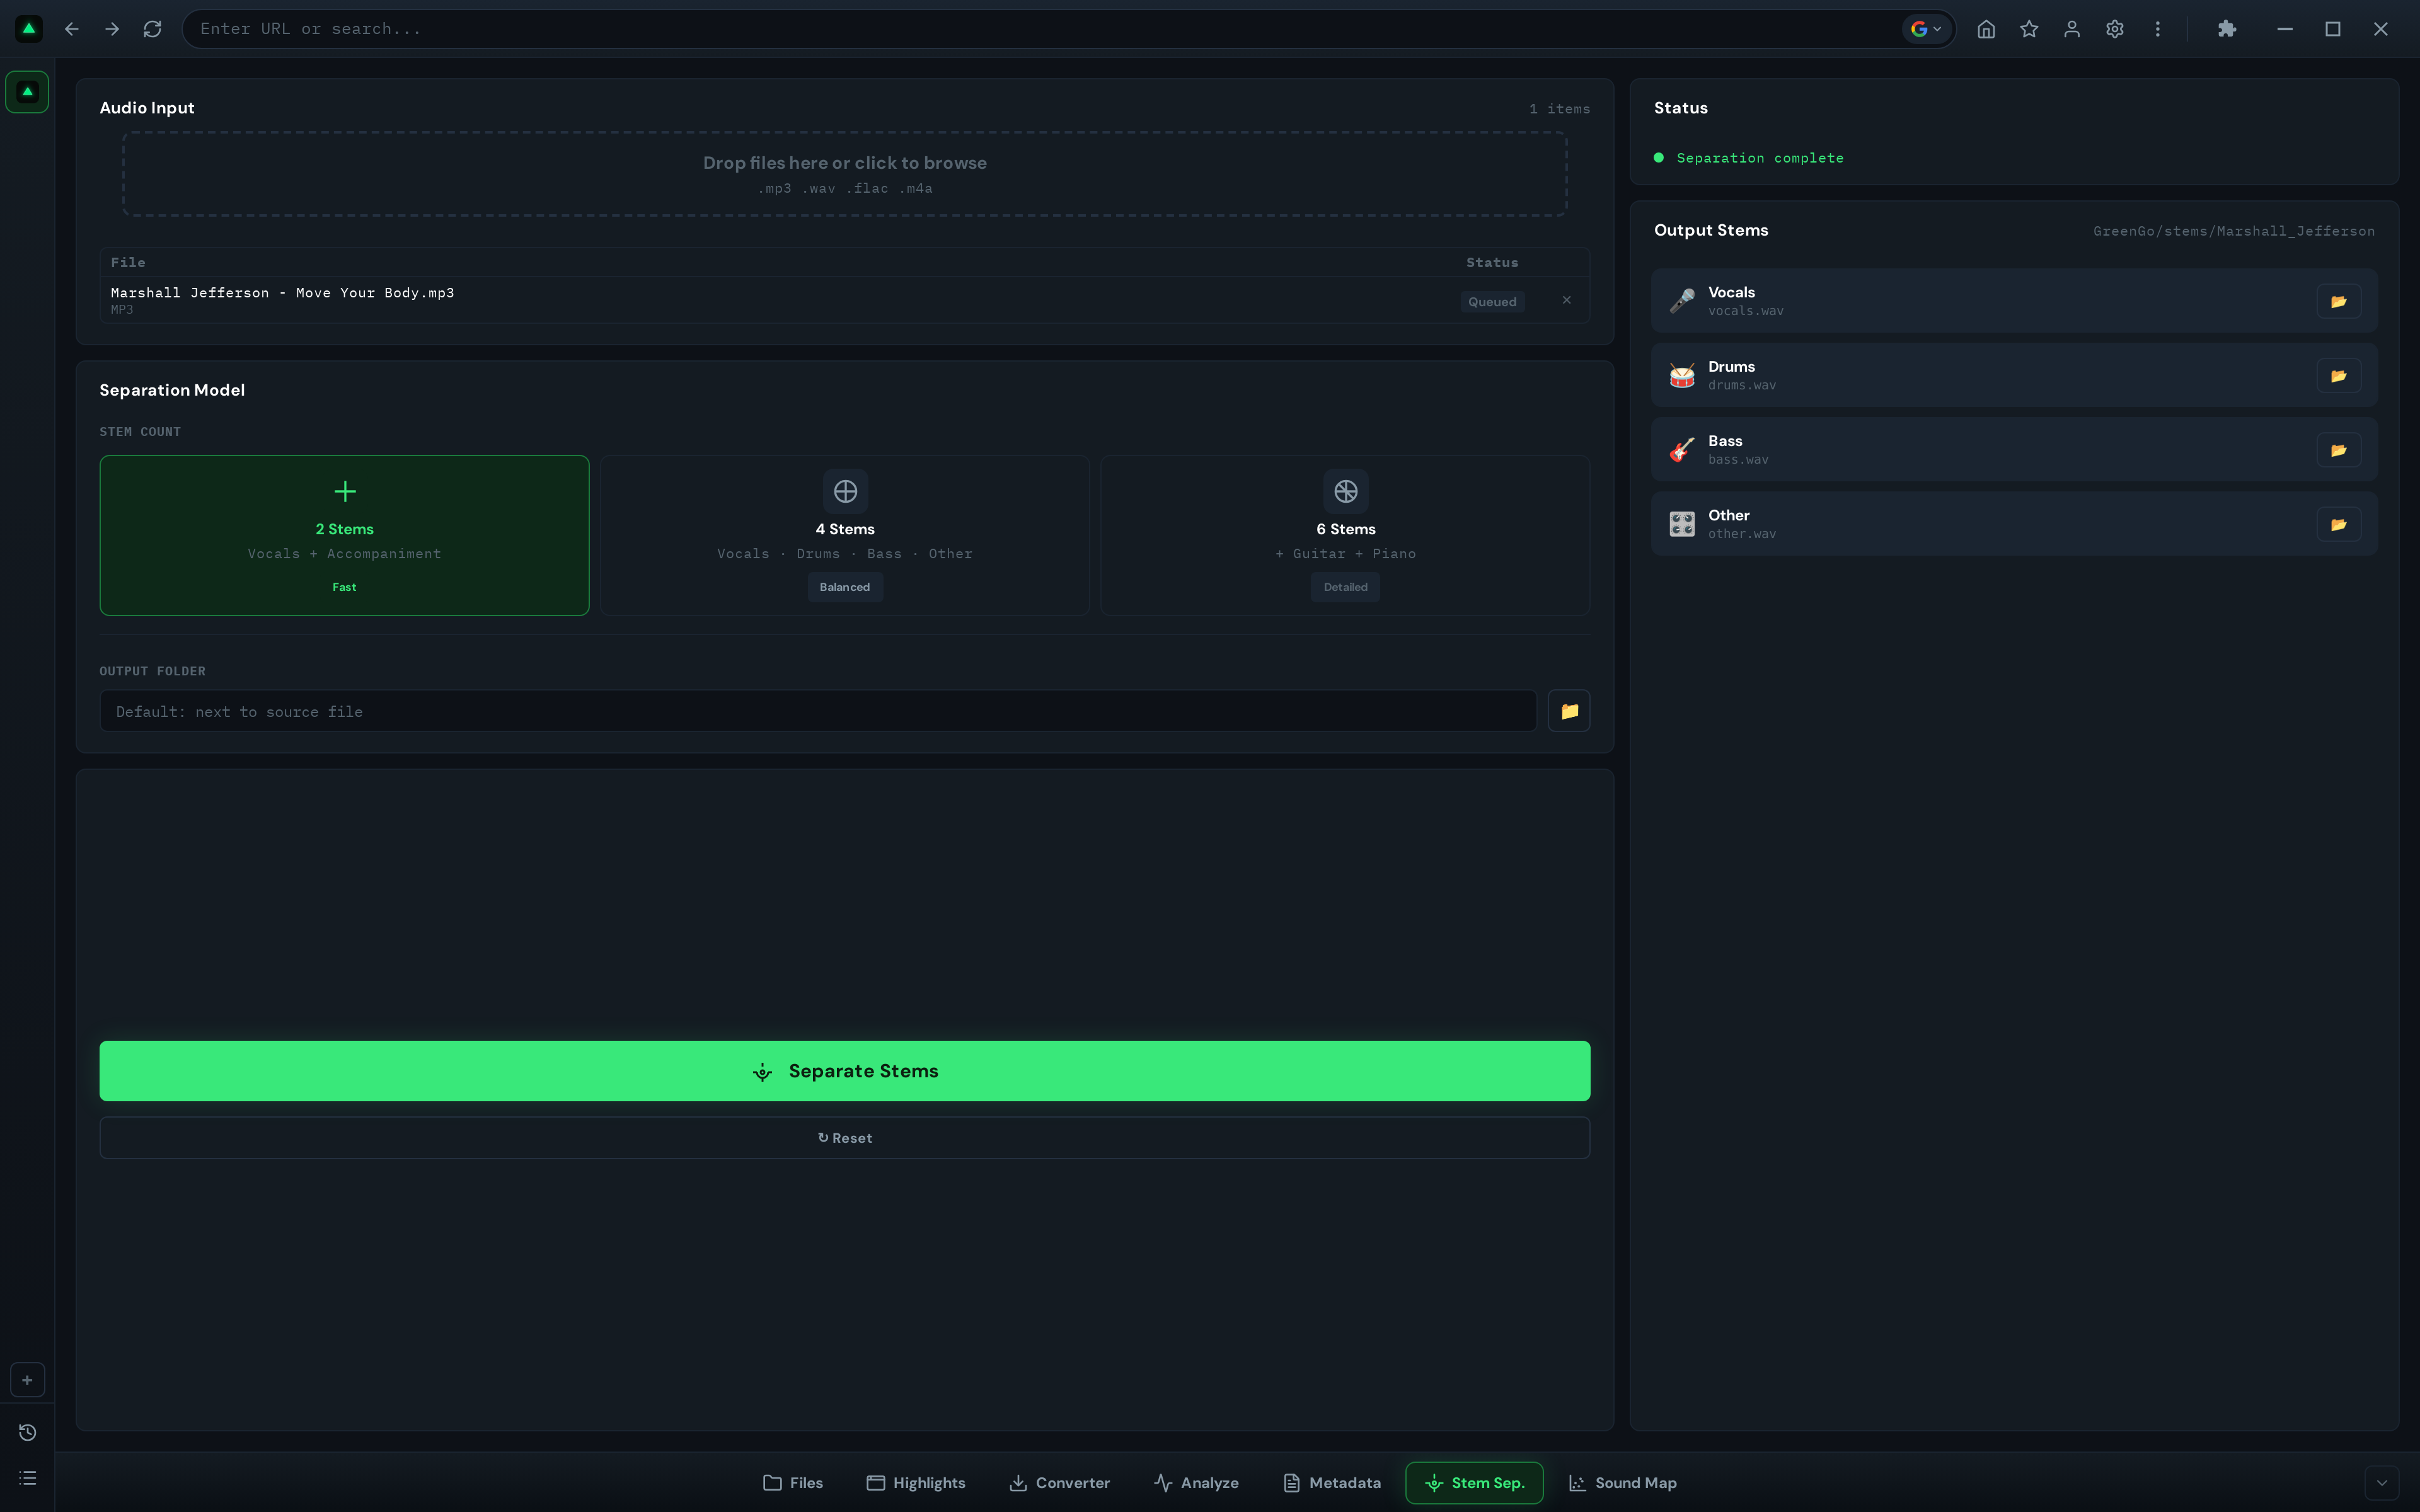
When separation completes, the status panel shows a green dot with 'Separation complete.' The results panel populates with a list of your stems, each showing:
- An icon (vocals, drums, bass, piano, guitar, other)
- The stem name
- The output filename (e.g., vocals.wav)
- A 'Reveal in Explorer' button (folder icon) to open the output folder in your file manager
Step 5: Access Your Stems
Click the folder icon next to any stem to open the output directory in your file manager. From there, drag the WAV files into your DAW, DJ software, or anywhere else.
Understanding Your Results
All stems are exported as WAV files at 44.1kHz stereo. If your input was mono, GreenGo automatically converts it to stereo before separation. If your input had more than 2 channels, extra channels are dropped.
Here's what each stem contains depending on your mode:
2-Stem mode:
vocals.wav— Isolated lead and backing vocalsno_vocals.wav— Everything else (drums, bass, instruments) combined
4-Stem mode:
vocals.wav— Isolated vocalsdrums.wav— All percussion (kick, snare, hi-hats, cymbals)bass.wav— Bass frequencies (bass guitar, synth bass, 808s)other.wav— Everything else (synths, guitars, strings, pads)
6-Stem mode:
vocals.wav— Isolated vocalsdrums.wav— All percussionbass.wav— Bass frequenciesother.wav— Remaining instruments (synths, strings, pads)guitar.wav— Isolated guitar partspiano.wav— Isolated piano/keyboard parts
Tips for Better Separation
- Use high-quality source files. 320kbps MP3 or WAV gives better results than 128kbps MP3. The AI can only work with what it's given.
- Pick the right mode. Don't use 6-stem mode if you only need vocals. 2-stem is faster and the vocal quality is identical.
- Be patient on first run. The first separation loads the Demucs model into memory (can take 10-20 seconds). Subsequent separations are faster because the model stays loaded.
- Check for bleed. No stem separation is perfect. You may hear faint vocals in the instrumental or faint drums in the vocal stem. This is normal. A noise gate or EQ in your DAW can clean up residual bleed.
- Organize your output. Set a consistent output folder so you know where your stems live. The default creates a subfolder per track, which keeps things organized.
- Use the Reset button. After each separation, click Reset to clear the inputs and start fresh. This prevents accidentally re-separating the same file.
What to Do with Your Stems
Once you have separated stems, here are the most common workflows:
- Mashups: Take the vocals from one track and the instrumental from another. Use 2-stem mode on both, then layer them in your DAW or DJ software.
- Remixes: Use 4 or 6-stem mode, then replace or rearrange individual elements. Swap the drums, change the bassline, keep the vocals.
- DJ edits: Create a clean instrumental version for mixing, or an acapella version for live layering. Use 2-stem mode for speed.
- Sampling: Isolate a drum break, a piano chord, or a bassline and use it as a sample in your productions. 6-stem mode gives you the most isolated elements.
- Practice: Mute the vocals to practice singing along, or mute the guitar to practice playing along. Load the stems into any audio player.
- Analysis: Send isolated stems to the Analyze tab to detect the key of a vocal melody or the BPM of a drum pattern independently.
Troubleshooting
'Demucs not installed' message
If you see an install notice with pip install demucs, the Demucs Python package isn't installed. On Windows, you also need the Microsoft Visual C++ Redistributable. Run pip install demucs in your terminal and restart GreenGo.
Separation is slow
Processing time depends on track length, stem count, and your CPU/GPU. A 4-minute track in 2-stem mode on a modern CPU takes about 30-60 seconds. 6-stem mode on a 8-minute track can take several minutes. If you have an NVIDIA GPU, GreenGo uses it automatically for CUDA acceleration.
'Limit Reached' lock screen
The free trial allows 3 stem separations. After that, you'll see a lock overlay with a 'Subscribe Now' button. Upgrade to the full version with a subscription for unlimited separations.
Stems sound noisy or have artifacts
This is normal. AI stem separation is never perfect because mixing permanently destroys some information. The vocal stem may have faint reverb tails from the original mix; the drum stem may have bleed from the bass. For cleaner results, try a higher-quality source file or use EQ and gating in your DAW.
Frequently Asked Questions
What audio formats can I separate?
GreenGo accepts MP3, WAV, FLAC, M4A, OGG, AAC, and WMA as input. Output is always WAV at 44.1kHz. If you need MP3 stems, use the Converter tab to convert the WAV files after separation.
Can I separate multiple files at once?
The Stem Separation tab processes one file at a time. For batch processing, separate each file individually. The operation logs to the Audio Tools history tab, so you can track what you've done.
How accurate is the separation?
Demucs HTDemucs is among the best open-source stem separation models available. Vocal isolation is typically 85-95% clean depending on the track. Complex mixes with heavy reverb or layered vocals will have more bleed than clean, dry recordings.
Do I need a GPU?
No. GreenGo runs Demucs on CPU by default. If you have an NVIDIA GPU with CUDA support, it's used automatically for faster processing. CPU mode works fine, it's just slower.
Can I preview stems before exporting?
The current version doesn't have a preview player. Stems are written directly to disk. You can click the folder icon to open the output directory and play the files in any audio player.
Does stem separation work offline?
Yes. Once Demucs is installed and the model is downloaded (happens automatically on first run), all separation runs locally on your machine. No internet connection needed.
Is it legal to download audio from YouTube?
Downloading audio from YouTube may violate YouTube's Terms of Service and copyright law, depending on the content and your jurisdiction. The Converter is intended for your own content, copyright-free material, or content you have explicit permission to download. GreenGo does not support piracy. With power comes responsibility — always respect copyright laws and creators' rights.